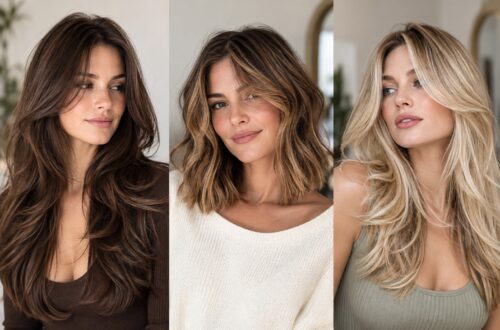

AI-generated beauty illustration.
A beanie can finish a winter outfit beautifully, right up until a high ponytail tries to occupy the same space. The easiest fix is to plan the hair and the hat together. Lower shapes, smaller sections, and a little room around the crown give you more options than fighting the knit once you're already at the door.
These seven ideas are adaptable to different lengths and textures. Try the hat on early, keep anything secured comfortably, and choose a style you won't mind adjusting when you take it off indoors.
GURLY may earn a small commission if you buy through links in this article.
1. Loose hair with a clean part
For a simple version, arrange the part where you like it and let the beanie sit without forcing all the hair flat underneath. Pull out the front pieces you want visible, then check the side view. You can tuck one side behind an ear to keep the shape intentional without styling every strand.
Once the hat comes off, use your fingers to reset the roots rather than immediately adding more product. The amount of adjustment you need will depend on your texture and how closely the hat fits.
Arrange the front with the hat off, then lower the beanie around that shape. Decide how much hair you want to show near each cheek before pulling the brim farther down. The beanie below has a folded cuff you can adjust to the shape you prefer.
We may earn a small commission if you buy through this link.
2. A low braid
Start the braid near the nape so the hat can sit above it. This keeps longer hair contained while leaving the crown relatively smooth. Bring the braid over one shoulder if the length rubs against a scarf or catches inside your coat.
Keep the starting point loose enough that lowering the hat doesn't pull on your scalp. A style should feel comfortable when you turn your head, not only when you're standing still.
Gather the length below the hat edge, divide it into three sections and braid to the end. Place the tie where it won't sit inside the collar. This works best when enough of the length reaches below the nape to stay gathered comfortably.
We may earn a small commission if you buy through this link.
For this style: Quince Ribbed Beanie - True Navy.
3. Two low braids
Two braids bring the hair forward, where it is easier to manage around outerwear. Part the hair, place the hat, and then decide where the braids should begin. This order makes it easier to leave enough room around the ears.
Use ties suited to the size of the braid ends. A smaller tie can look tidy on a narrow section, but don't force it around more hair than it comfortably holds.
Position the hat first, then start each braid below its edge. Bring them forward over the coat if that keeps them clear of the scarf. Check the two starting points before tightening the ends.
For this style: Goody ComfortFlex Seamless Elastics - Black, 10 count.
For this style: Quince Ribbed Beanie - True Navy.
4. A low ponytail
Place the tie below the edge of the hat and check that it doesn't press into a bulky collar. If you have shorter front layers, let them sit naturally or secure them with a comfortable pin outside the area the hat compresses.
For thicker hair, choose a tie that holds without repeated tight wrapping. The neatest ponytail isn't useful if you spend the whole walk wanting to loosen it.
Make the fastening below the brim rather than compressing it underneath. If the linked fabric elastic is too small or too loose for your full section, choose a better-fitting tie from your own kit. Comfortable tension matters more than using the exact accessory shown.
For this style: Goody ComfortFlex Seamless Elastics - Black, 10 count.
For this style: Quince Ribbed Beanie - True Navy.
5. A small low bun
Keep the bun below the beanie, then put on your scarf to check the space. A compact bun slightly to one side may work better than a larger shape directly against the back of your neck. Try both placements before adding more pins.
If your hair is too short for a full bun, tuck only the length that reaches and let the rest remain soft. You don't need to turn a comfortable style into a tight one to hide every end.
Turn the gathered length into a loose coil and pin only the places that need support. Check the bun against the collar before adding more pins. Moving it slightly to one side may be easier than trying to flatten a large bun under the hat.
We may earn a small commission if you buy through this link.
For this style: Quince Ribbed Beanie - True Navy.
6. A half-up style with a low fastening
Gather a small upper section, but secure it lower than you would for a high half-up ponytail. The aim is to keep some hair away from the face without creating a lump under the crown of the hat. Try the placement with the beanie on before committing to it.
Gather a modest upper section and bring the fastening down below the brim. Put the hat on again before securing the style more firmly. If the tie creates a lump, reduce the gathered section or lower the placement.
For this style: Goody ComfortFlex Seamless Elastics - Black, 10 count.
For this style: Quince Ribbed Beanie - True Navy.
7. Short hair with a little front shape
With a bob or shorter cut, the visible front and side pieces can do most of the styling. Choose how much hair you want to show near the face, then position the hat around that shape. A folded brim changes the balance, so check it before adding styling product.
If one front section keeps falling into your face, secure a small amount with a pin in a comfortable position outside the brim's pressure area. The rest of the short cut can stay loose. Test the placement with the actual hat rather than adding several hidden pins automatically.
For this style: Goody SlideProof Grip Bobby Pins - Black, 100 count.
For this style: Quince Ribbed Beanie - True Navy.
Keep a small reset plan
If your texture benefits from brushing, detangle gently before putting the hat on. If brushing disrupts your curls or coils, use your preferred method instead. There is no need to make every hair type follow the same prep routine.
At your destination, remove the beanie slowly, check the part, and loosen the fastening if it feels compressed. A quick finger adjustment is often a more useful first step than layering on spray. The hairstyle and the hat should feel like they belong together, with enough flexibility for the moment you come inside.
We may earn a small commission if you buy through this link.
Product sources
- Quince: Quince Ribbed Beanie - True Navy
- Target: Goody ComfortFlex Seamless Elastics - Black, 10 count
- Target: Goody SlideProof Grip Bobby Pins - Black, 100 count
- Target: Wet Brush Original Detangler - Frost Pink
Product details checked November 2, 2026. Colors, versions and availability can change. Check the current listing before buying.